Setup PyCharm to debug a containerized Django app
As soon as I learned how to containerize Django with Docker, it has been a preferred way to run Django in my development environment. One of the advantages it’s given me is that I don’t have to install Postgres or other services on my MacBook. I just put them in a container that I take up and down as needed.
If I am on another computer, I just git clone the project, spin up the containers and be up and running in no time.
One problem I had with this, was that I didn’t know how to debug my apps that ran inside the containers. So there was a lot of “print debugging” and other tricks. As I tried to build apps a little more complex this was a bit annoying.
At some point I learned that you can setup debugging of Django inside your container. In this article I’ll show you how you can do this. I will not go through how to containerize your Django app, assuming you already know how to do that.
Docker settings in PyCharm
The first step we need to do is to tell PyCharm how to connect to our Docker. To do so open the PyCharm Settings dialog, and find the Build, Execution, Deployment node, and click the + button to create a Docker configuration.
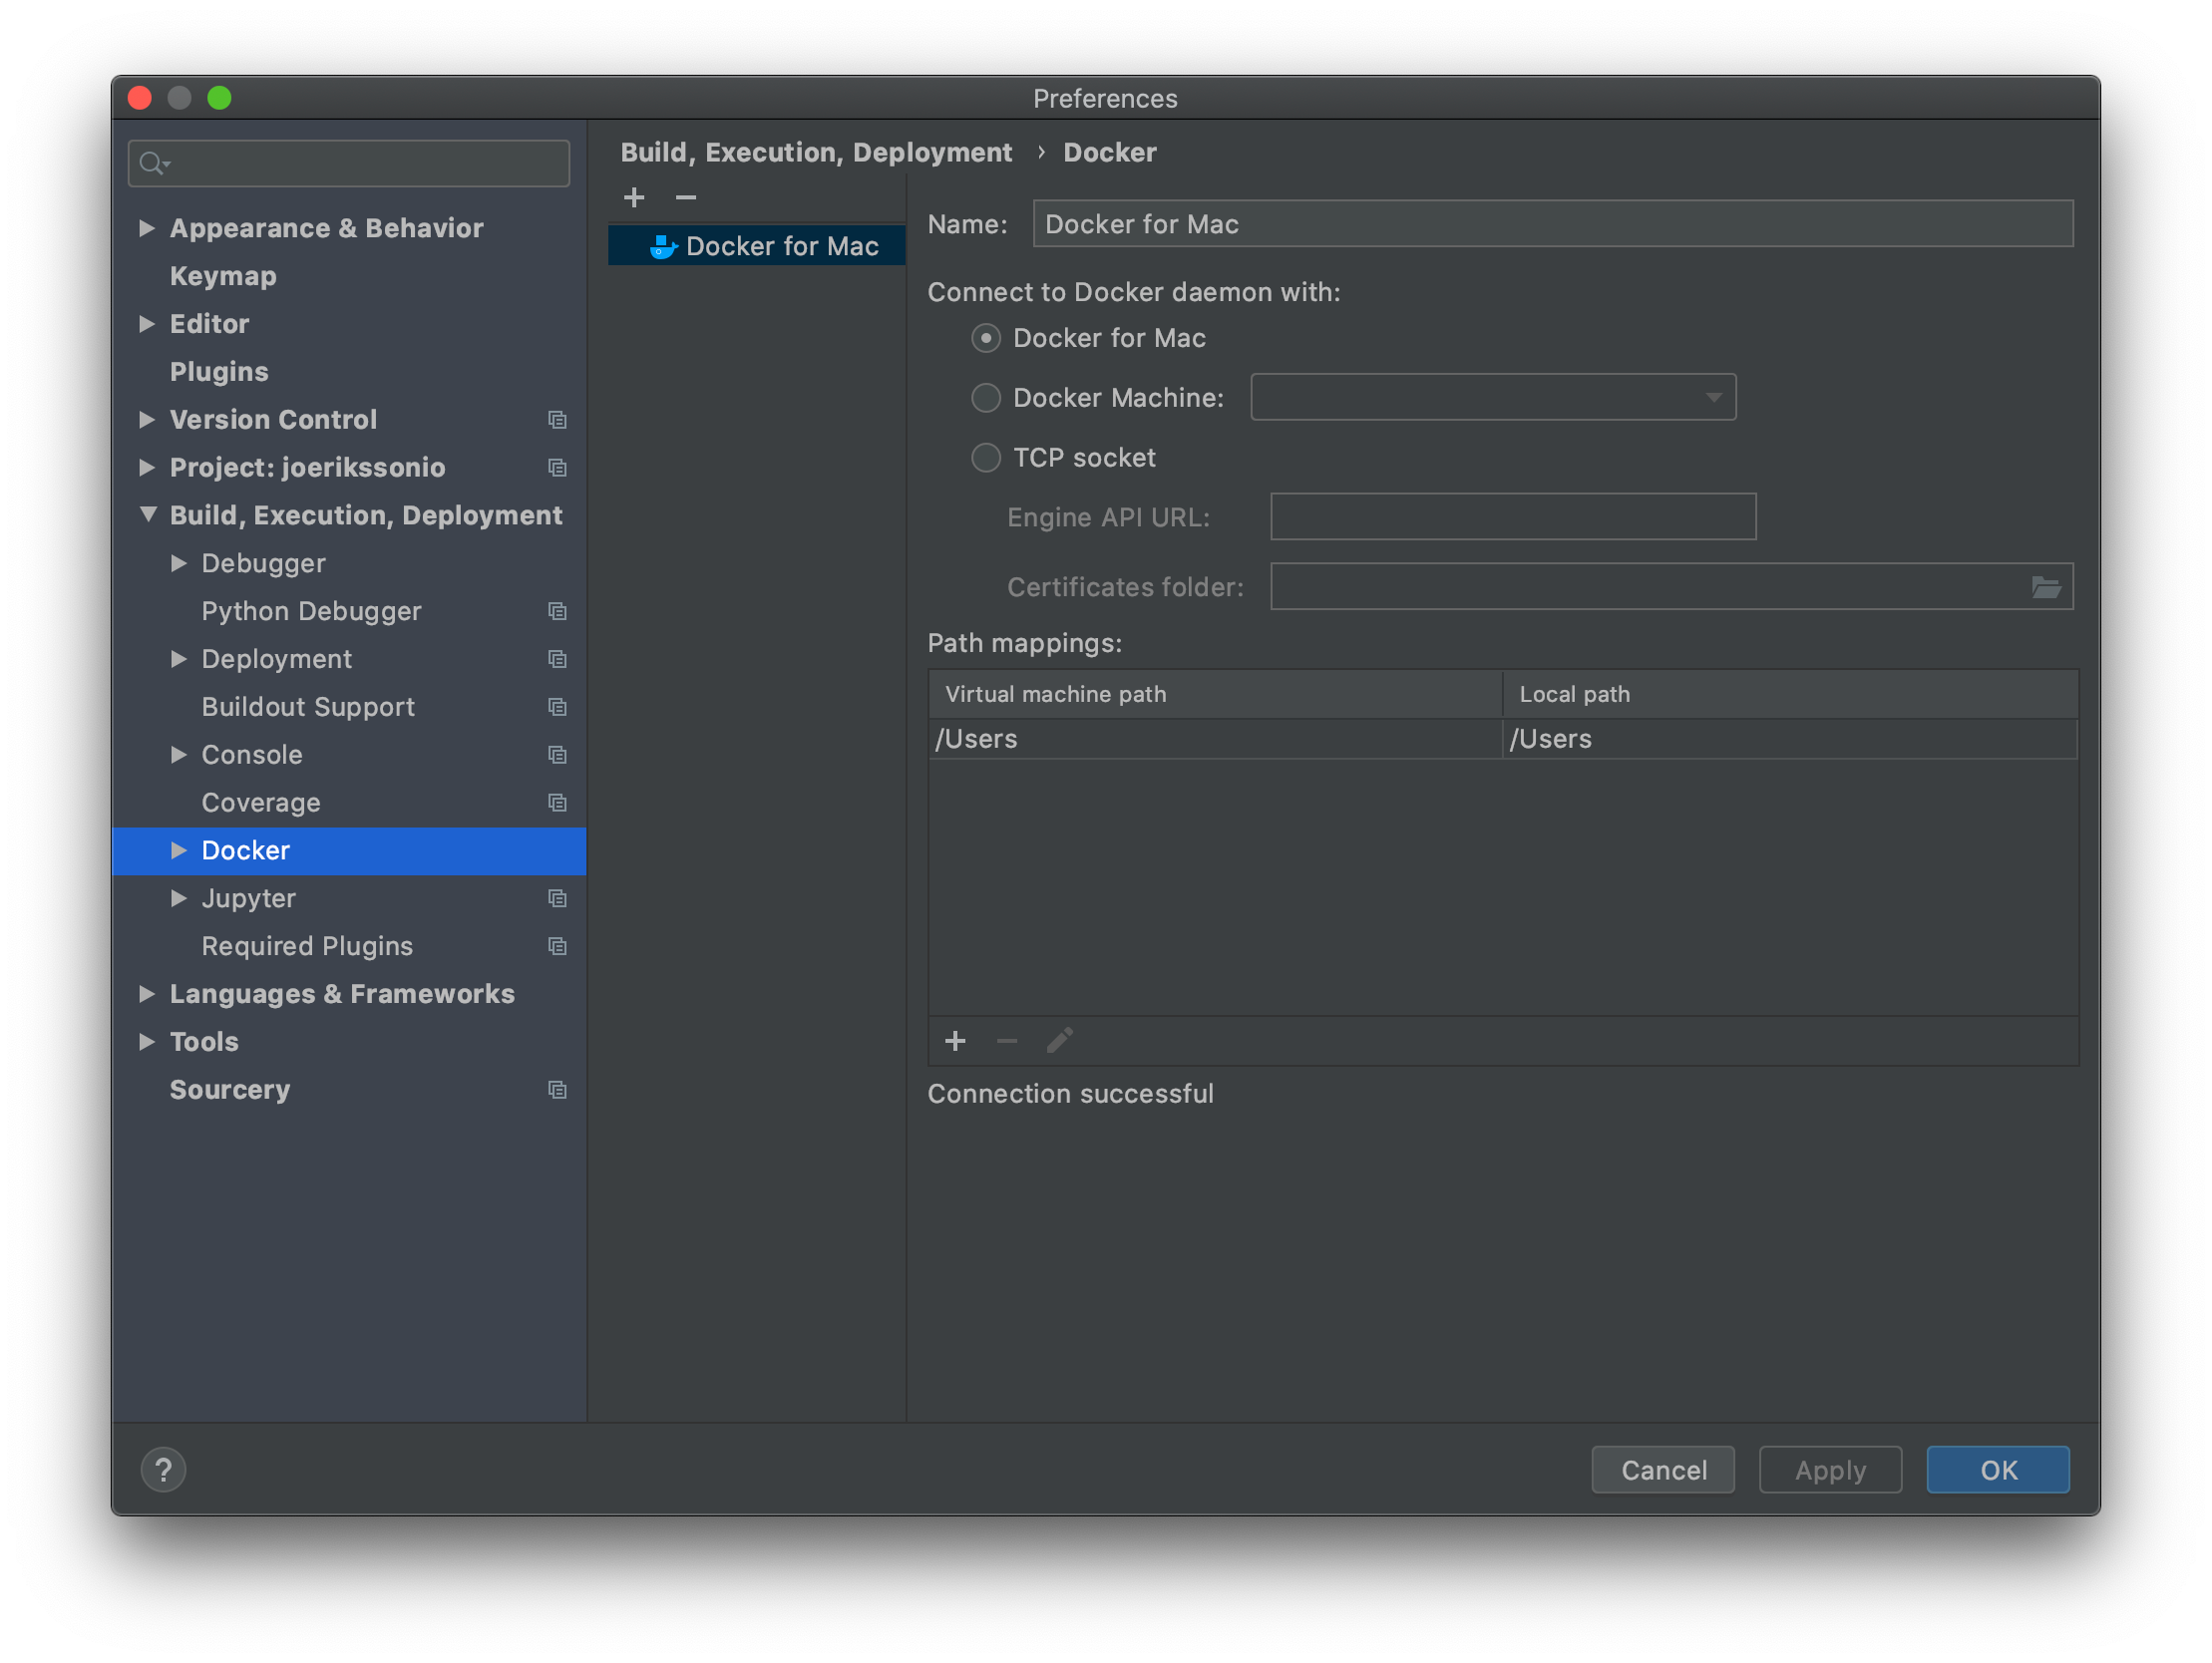
For macOS, you select the Docker for Mac option. Then apply the changes.
Setup a remote interpreter
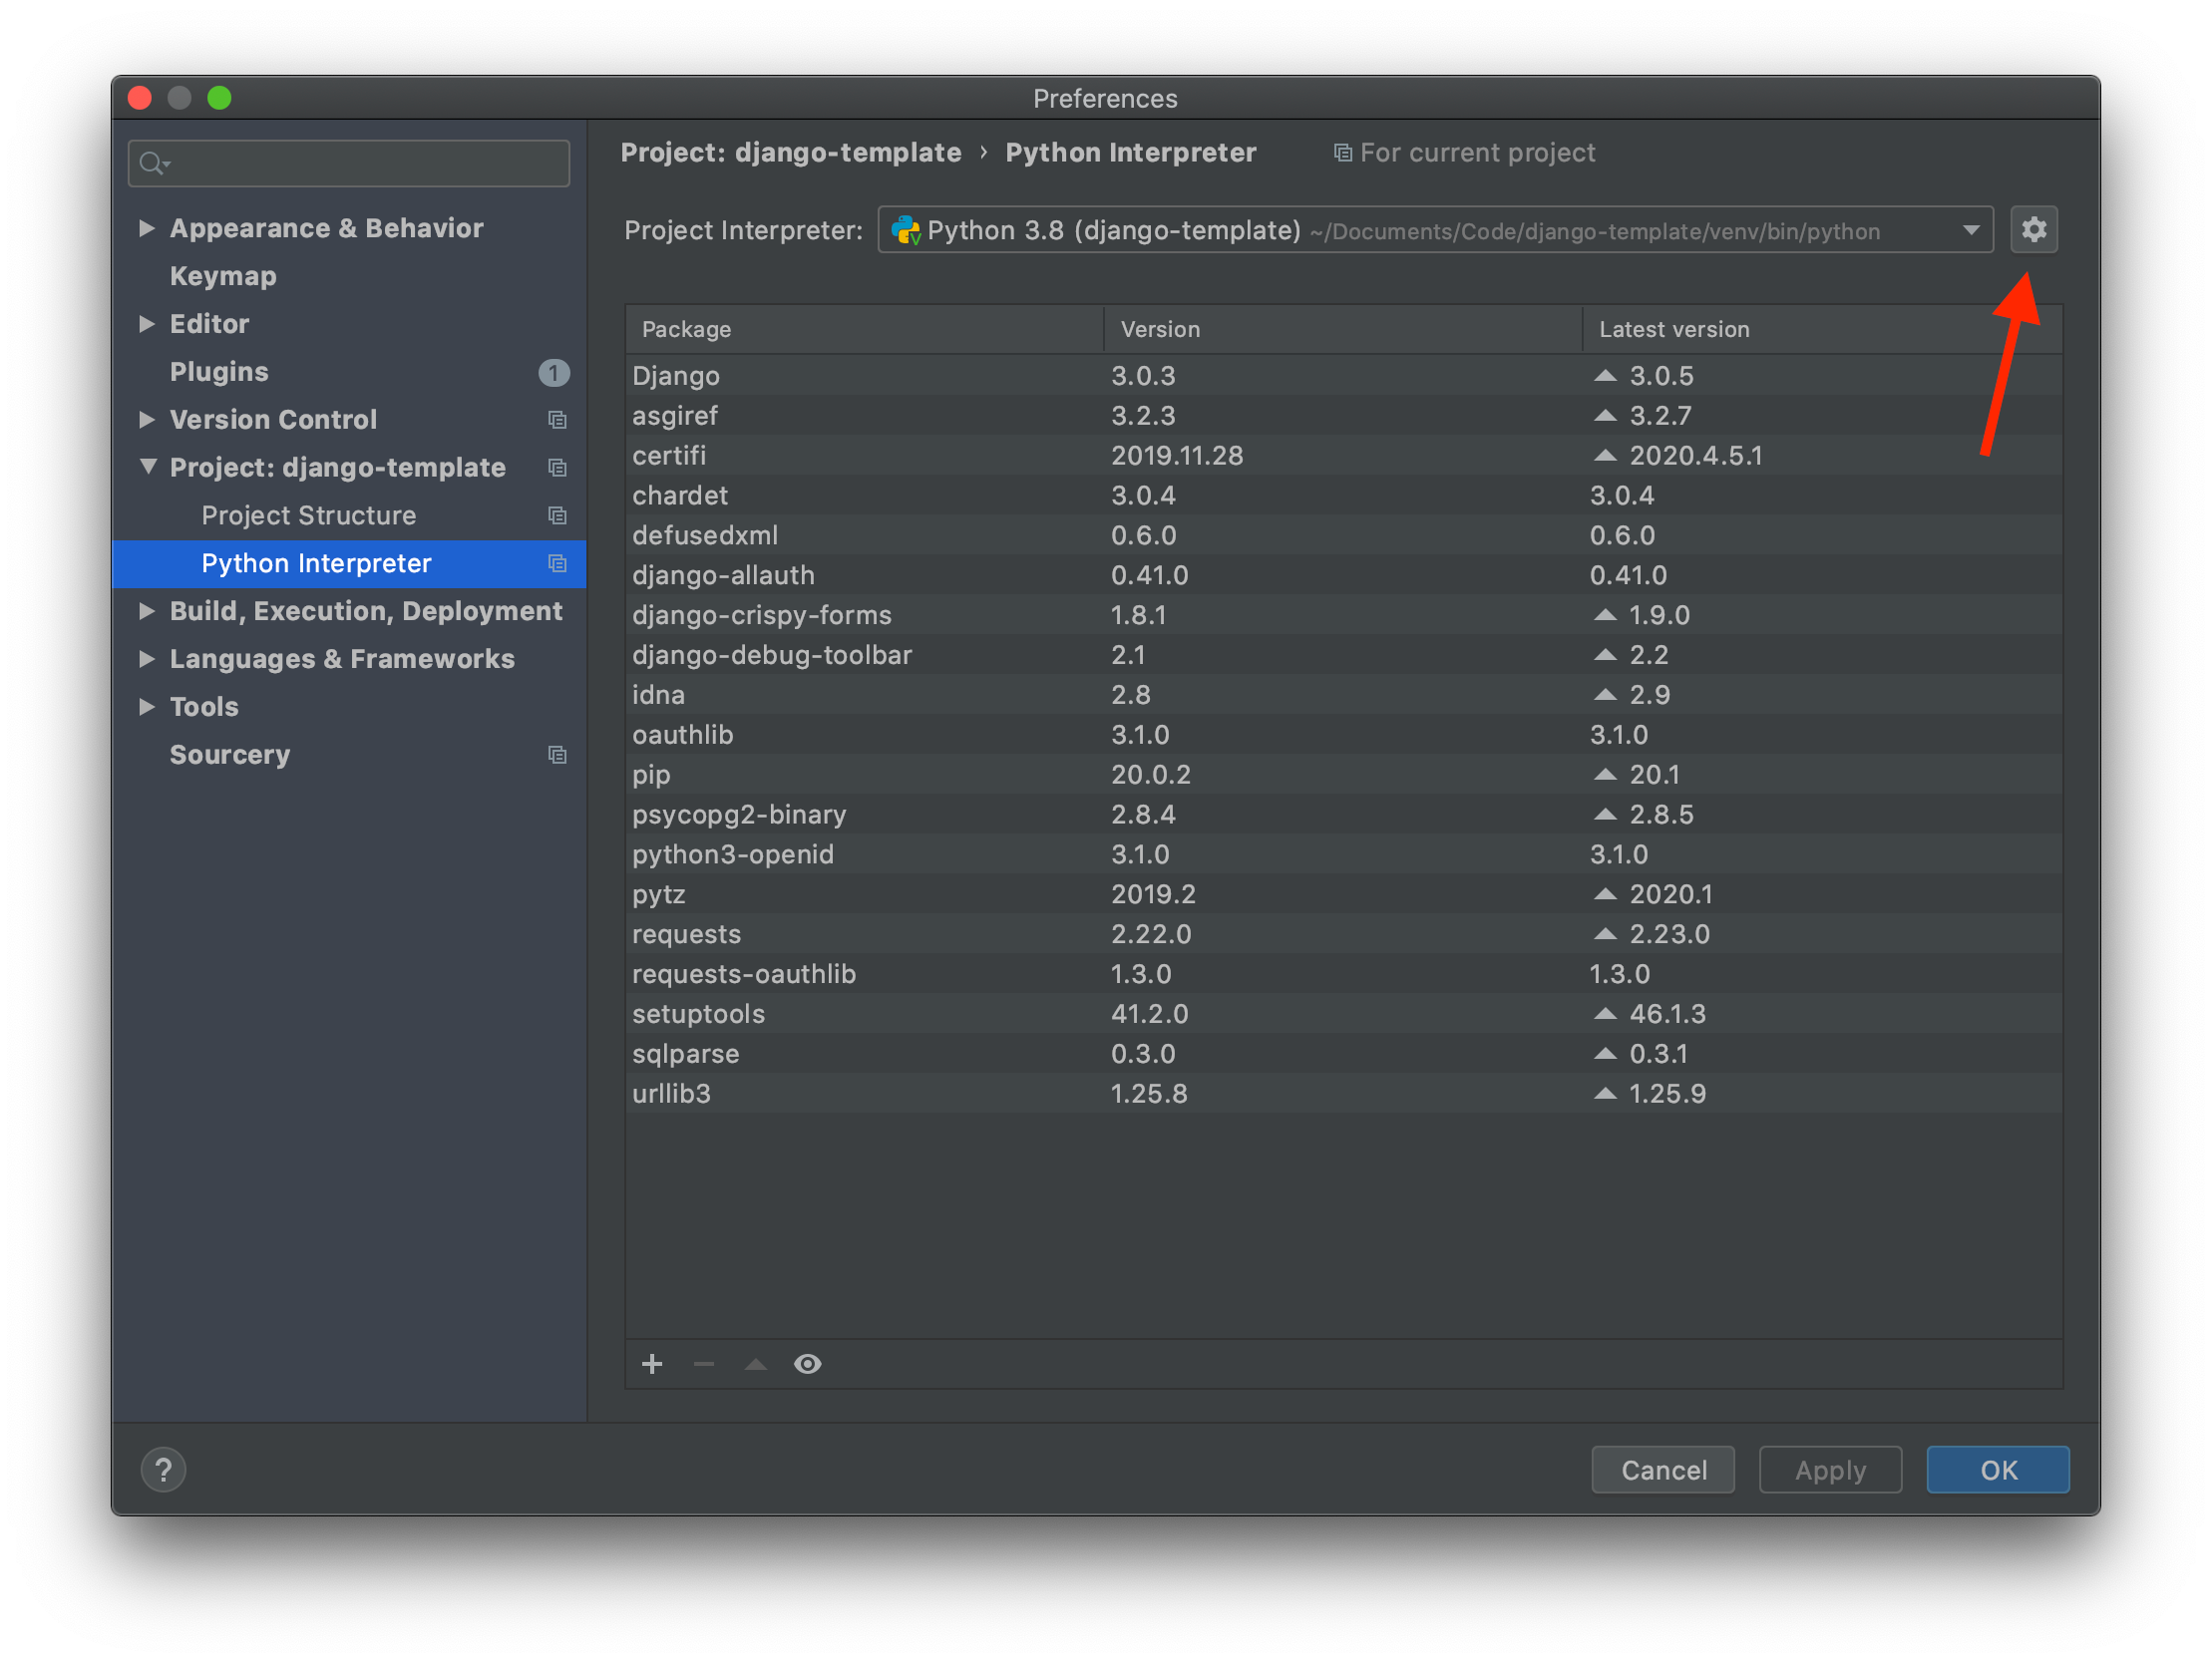
Now that we got the Docker configuration done, it’s time to configure Docker Compose as a remote interpreter. Open the preferences dialog again and select the Project <project name> -> Project Interpreter node on the left-hand side. Click the gear icon and choose Add.
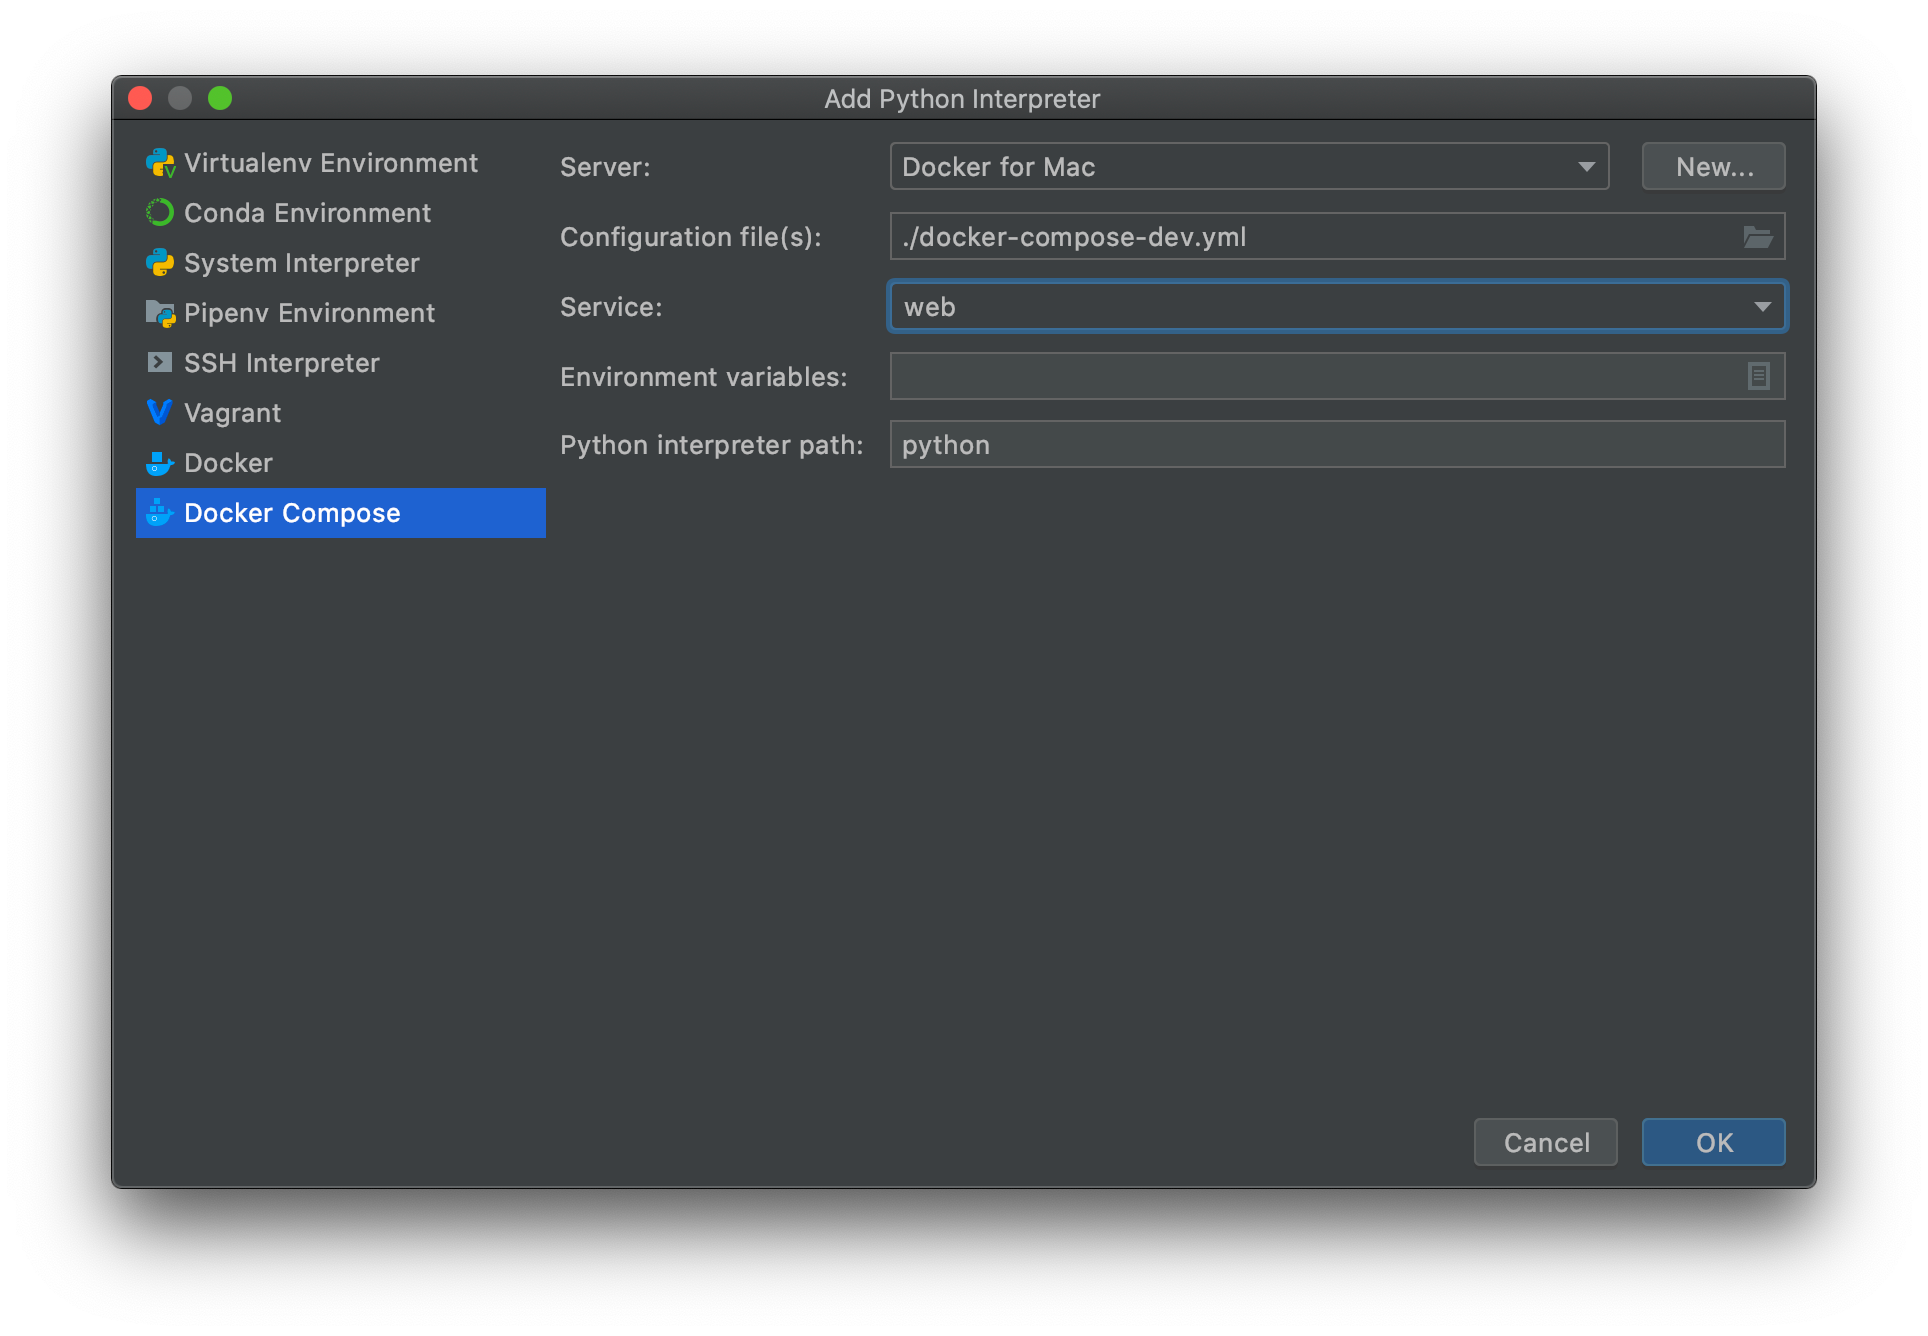
In the next dialog, choose Docker Compose on the left-hand side, and select the Docker configuration you created in the previous steps in the server field. The Configuration file(s) field should point to your Docker Compose file, and in the Service field choose the web application service in your Docker Compose.
Any other services you have in your Docker Compose file will also start when we later run the Run/Debug configuration in PyCharm. But it is the web service that the debugger will attach to.
Click OK to apply the changes. Back in the preferences dialog we can now see that the project has a Remote Interpreter.

Close the preferences dialog.
Create a run/debug configuration
Now that we’ve configured PyCharm to be able to connect to Docker, and created a Remote Interpreter configuration based on our Docker Compose file, we can create a Run/Debug configuration. Click on the Add configuration... button at the top of the PyCharm window.
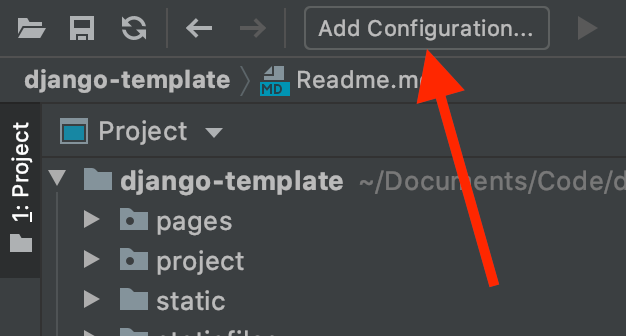
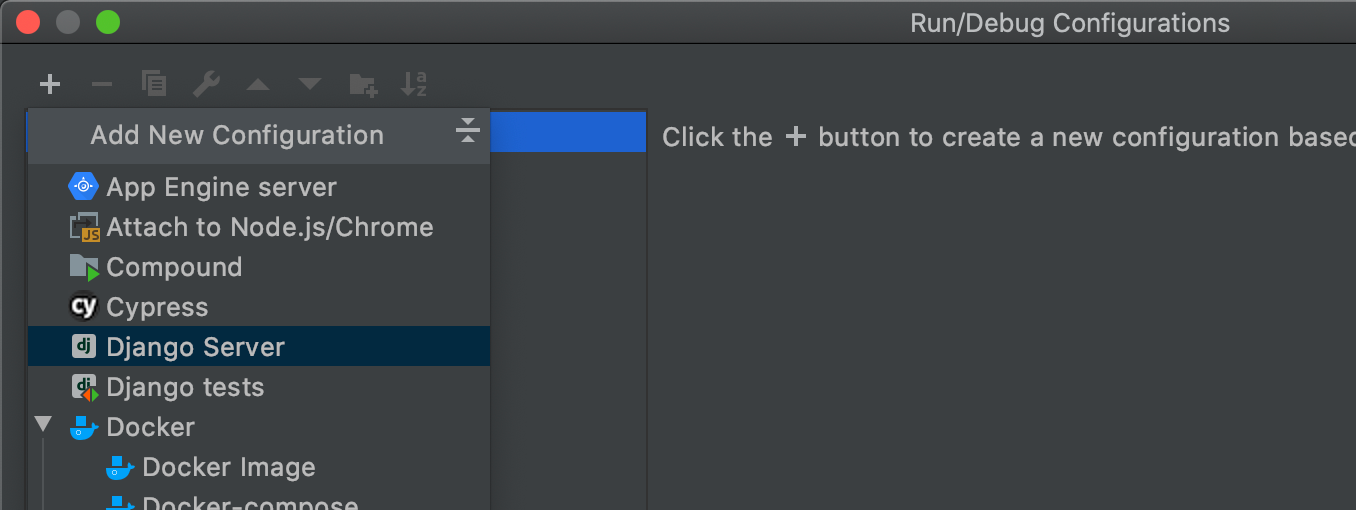
Next click the + button and choose Django server.
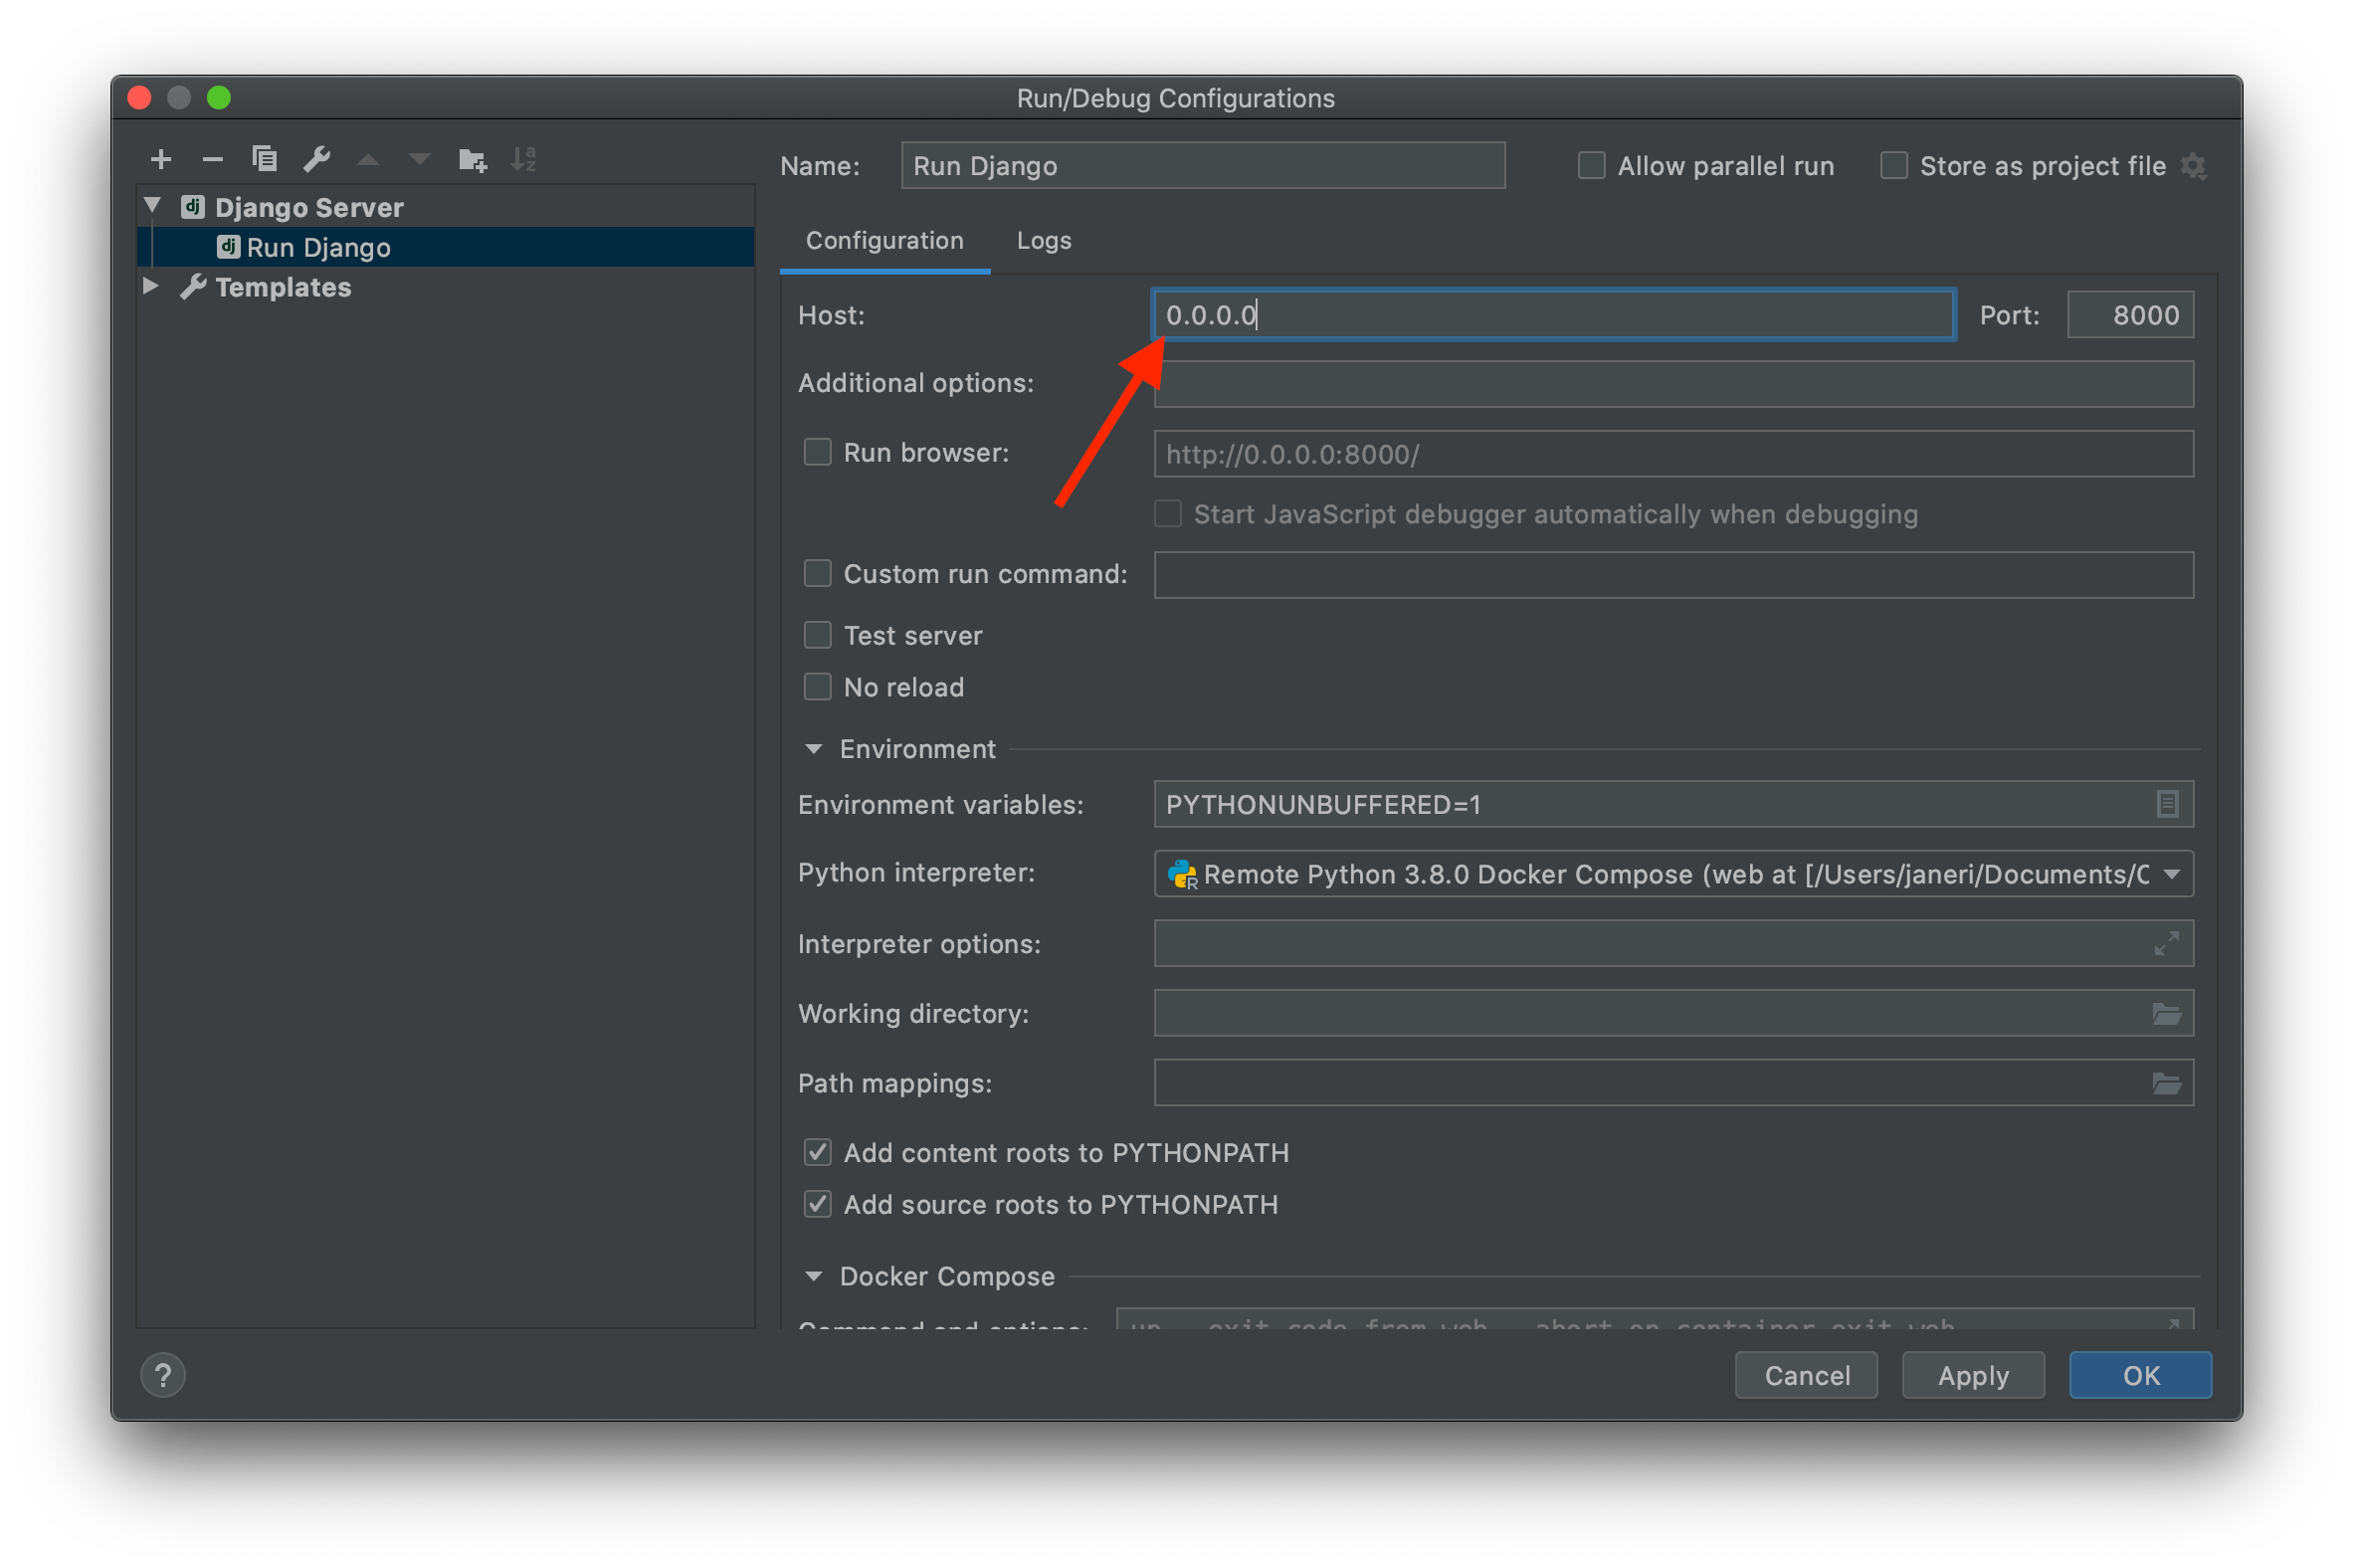
Give the configuration a name. The important thing in this configuration dialog is to set the Host field to 0.0.0.0. For some reason it won’t work if we set it to for example 127.0.0.1.
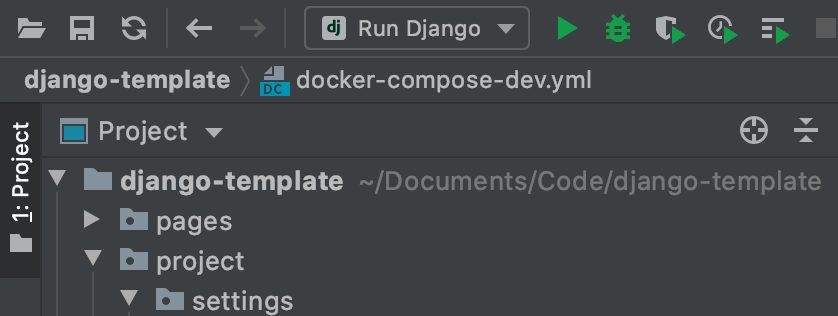
Click OK to save our configuration. We can now see our Run/Debug configuration at the top of the PyCharm window, and the buttons (for run, debug etc) are enabled.
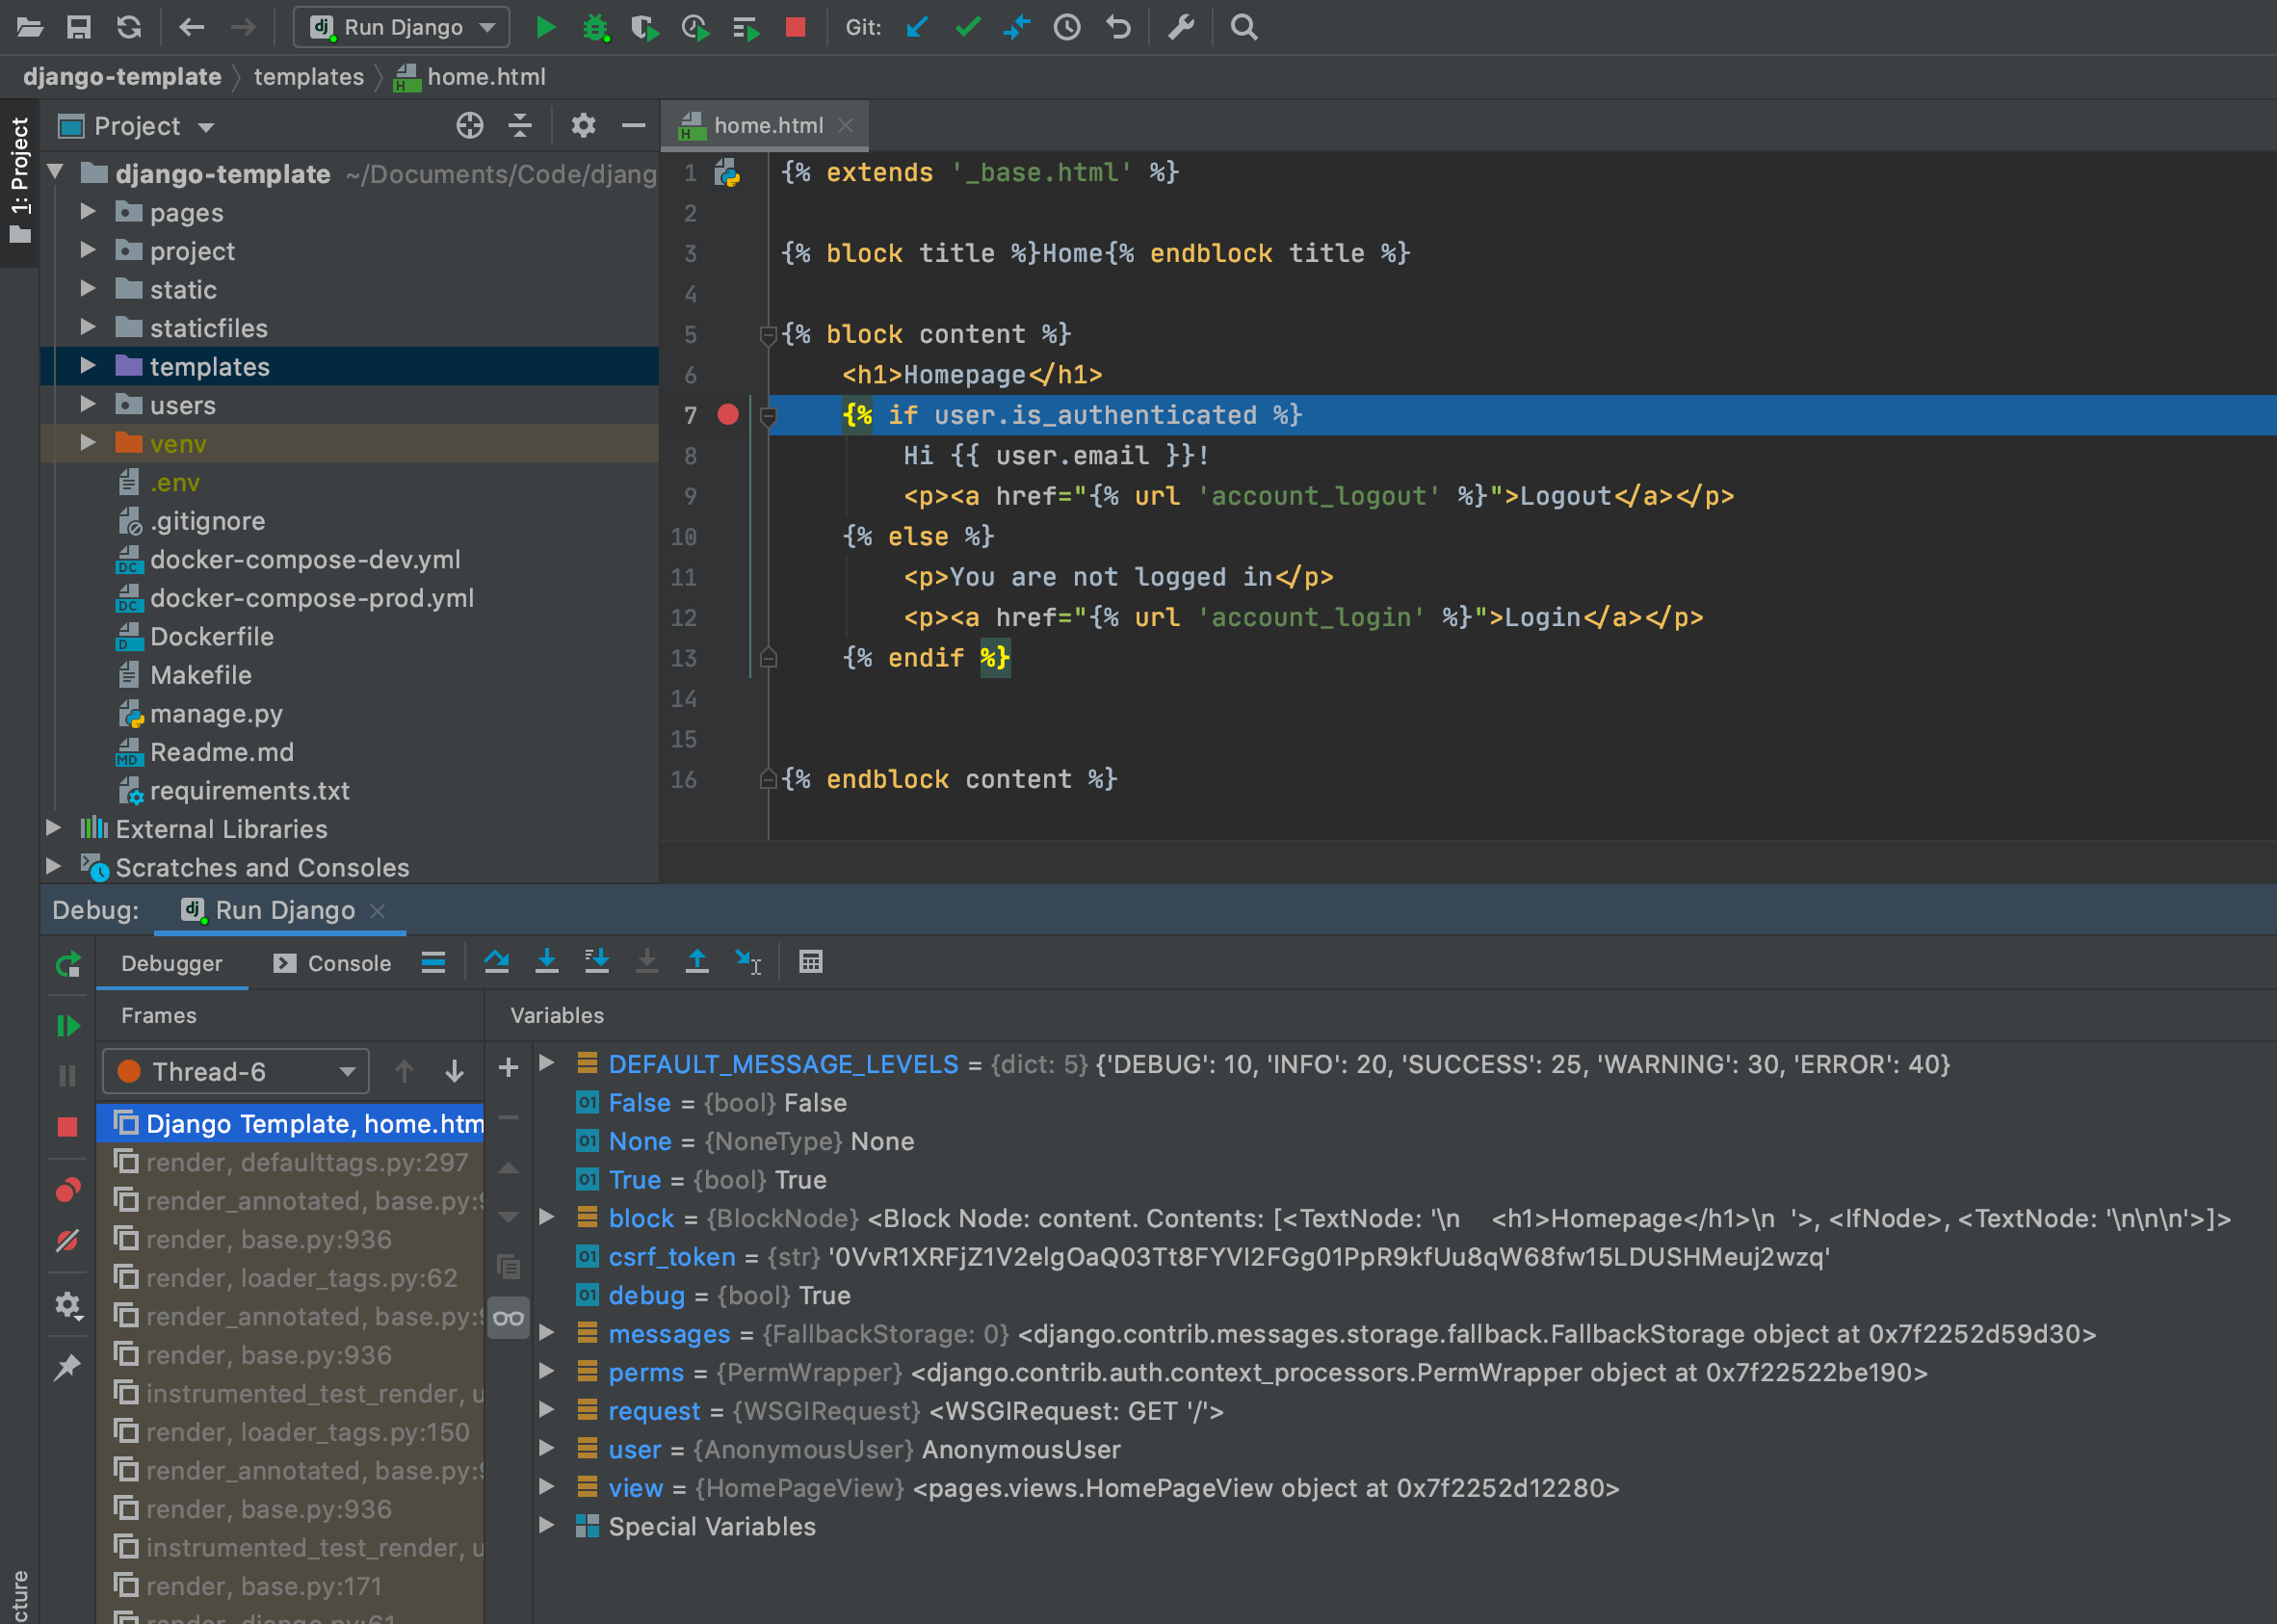
If we now set breakpoints in our Django project, and press the Debug button next to our Run/Debug configuration that we have created, we can debug our Django project that runs inside the Docker container.
Conclusion
In this article I’ve shown you how to setup PyCharm to debug a Django project that runs inside a Docker Container.
Let me know on Twitter or Mastodon if I can improve this article, or if you have other resources to help out with understanding this topic.